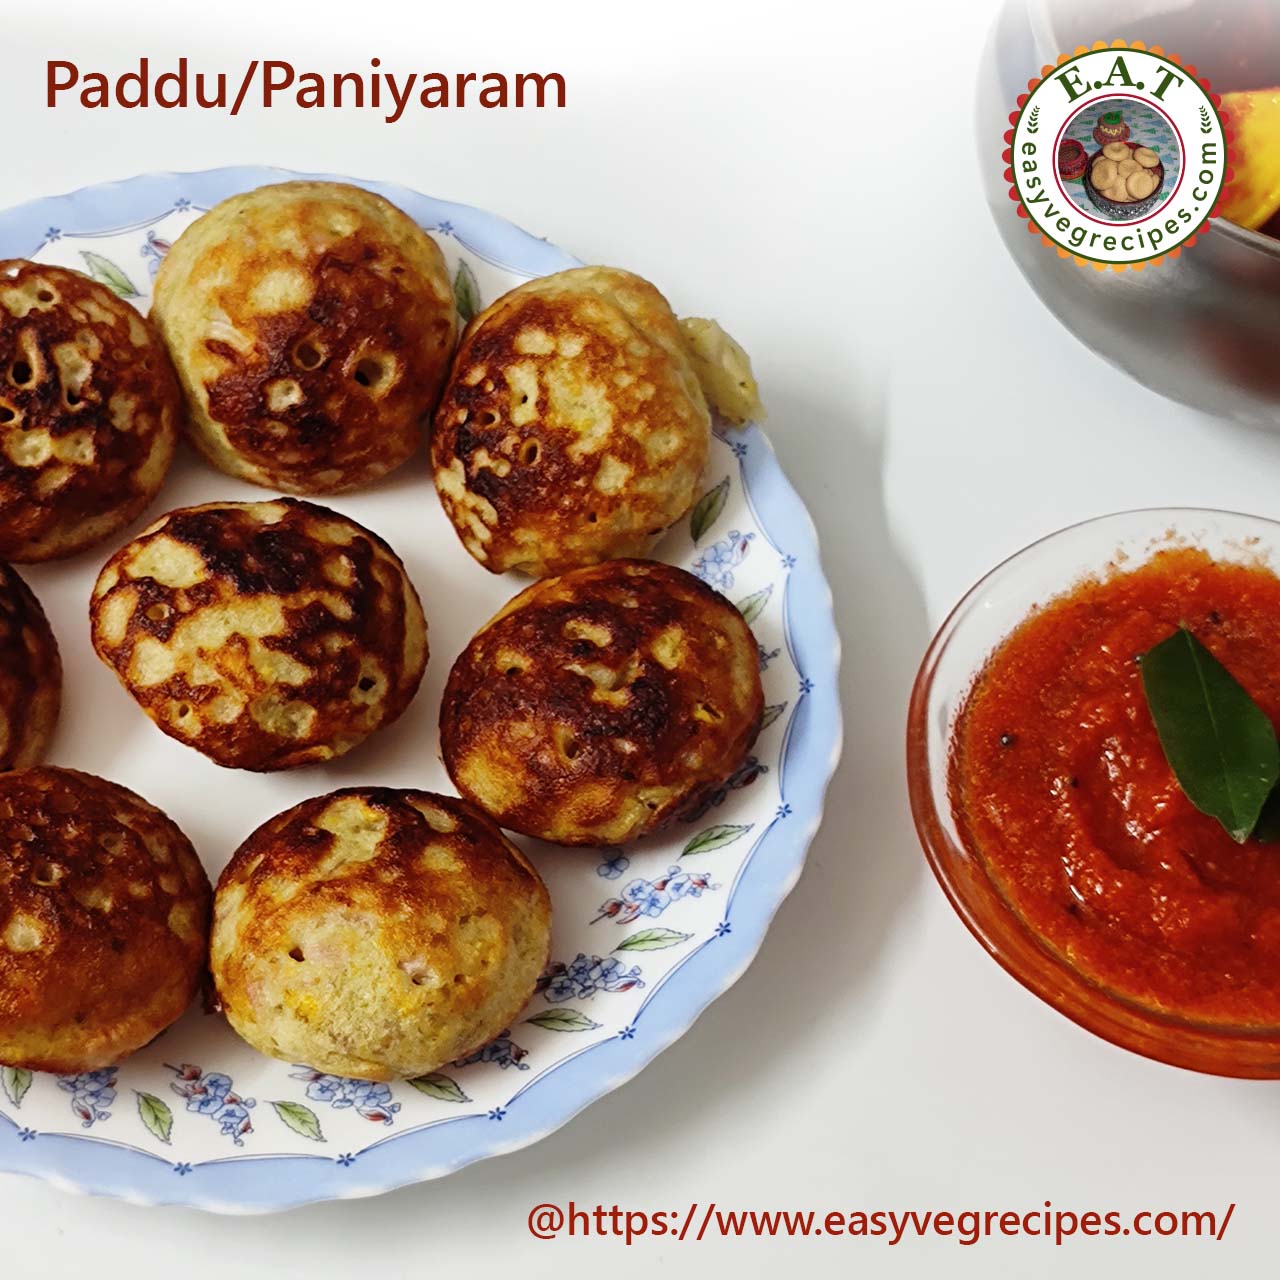
Hi friends, Thank you all for visiting my website and @EATeasyvegrecipes youtube channel. Today's recipe is paddu. It has so many names like paniyaram, guntaponganalu, paddu or guliyappa, appe. Paddu is a South Indian breakfast recipe. Paddu is made with leftover dosa batter. Paddu or paniyaram is a very easy and simple dish any one can make. But we need to have the skillet. The paddu skillet has slots in it. I already posted ponganalu recipe in the website. Paddu skillet image is also posted in that, click the link to have a look of the skillet. I have a stone one so I use it, but non-stick paddu maker is also available online. I picked the paddu recipe from my SIL Chandra. This is also made with dosa batter only but we have add to some soaked chana dal, coriander and green chillis also. My mom also used to make it like the same way only. I like paddu as it takes very less oil.
Please like, share and subscribe to easyvegrecipes YouTube channel for video recipes. And click the BELL icon for further notifications.
Paddu Recipe | How to make Paddu | (Guliyappa recipe) Author: Sailaja Angara Preparation Time: Cooking time: Servings: 6 people
paddu -- a simple fluffy paddu recipe with dosa batter.
Hi friends, thank you all for visiting my website and @EATeasyvegrecipes youtube channel. Today's recipe is pappu charu. this is Andhra style pappu charu recipe I am presenting here. Though it is simple pappu charu recipe we need to have a powder called sambar karam to make it. The powder can be used in other vegetables too as a spice powder. We can get the sambar karam in stores also, but I prefer to use home made only. Click the above link to get the recipe.
I picked the recipe from my MIL and some other friends. They add other vegetables like carrot, okra, baingan and tomato also. But I prefer to add only onions and some garlic.
You can find different types of charu or rasam from my website like: Mango rasam Pesarapappu Charu Inguva charu Jeera Rasam Healthy Rasam
Click the link below for a detailed recipe video. Please like, share and subscribe to easyvegrecipes YouTube channel for video recipes. And click the BELL icon for further notifications.
Andhra Pappu Charu Recipe | How to make Pappu Charu |(Pappu charu Recipe) Author: Sailaja Angara Preparation Time: Cooking time: Servings: 4 People
Andhra Style Pappu Charu Recipe is an aromatic and spicy Lentil Soup from Andhra Pradesh. A perfect combination of spicy, tangy dal, it tastes heavenly when served with Steamed Rice, and ghee fried curd chillies on the side.
Ingredients:
1 Big Onion
10 to 12 Garlic
1 Cup Tamarind Juice
1 Cup Toor Dal
Salt to Taste
1 Tsp Turmeric Powder
1 Tbsp Red chilli powder
1 Tbsp Sambar Karam Powder
1 Tsp Mustard Seeds
1 Tsp Cumin Seeds
1 Red Chilli
5 to 7 Curry Leaves
Fistful Coriander leaves
1 Red Chilli
Procedure:
Soak tamarind in water for half an hour and extract the juice out of it.
Pressure cook toor dal for three whistles.
Once cooled mash it and keep it aside.
Chop onions, peel the skin of garlic.
Heat oil in a pressure cooker, add mustard seeds, cumin seeds, red chilli and curry leaves.
Add garlic, fry for a while. Add onions and fry them too for a while.
Saute the onions till they turn translucent.
Add tamarind juice, salt and turmeric powder.
Pressure cook pappu charu for two whistles.
Allow this to cool and once the pressure goes off add sambar karam and red chilli powder.
Let the pappu charu boil for 2 minutes.
Add mashed toor dal and mix it gently.
Allow the pappu charu Andhra style to rolling boil for two minutes.
Serve spicy pappuc charu with hot piping rice and a dash of ghee.
Hi friends, Thank you all for visiting my website and @EATeasyvegrecipes youtube channel. Today's recipe is sabudana khichdi recipe. Sabudana or saggubiyyam as we call in Telugu is starch extracted from the roots of tapoica and processed into pearl like spears. Sabudana contains a high amount of carbohydrates, making it a fast energy booster. The khichdi is an Indian dish made from soaked sabudana (tapioca pearls). It is the dish of choice when an individuals observe a "fast" during Shivratri, Navratri, or any other Hindu religious occasion. It is typically prepared in Indian states of Maharashtra, Karnataka, Uttar Pradesh, Madhya Pradesh, Rajasthan and Gujarat. In major towns like Mumbai, Pune, Indore, Bhopal, Jaipur and Nagpur, it is available as street food and is widely eaten throughout the year. Normally in Telugu states we do not eat anything that is cooked during fasting. So we consider it as a special dish and make it on a special occassion. I learned it from my sister in law who is a Marathi. The recipe needs a lot of coriander leaves but I add very less as my family members do not like it. If you like you can add it. We always love have sabudana khichdi recipe non sticky and without potato.
Please check the website for other recipes with sabudana like: Sabudana Upma Saggubiyyam Payasam Sabudana Dosa
Click the video link for a detailed recipe video. Please like, share and subscribe to easyvegrecipes YouTube channel for video recipes. And click the BELL icon for further notifications.
Sabudana Khichdi Recipe | How to make Sabudana Khichdi Author: Sailaja Angara Preparation Time: Cooking time: Servings: 6 People
Sabudana ki khichdi is a delicious dish made from tapioca pearls (sago) made with peanuts and a few spices. Follow the instructions given here and make the best non-sticky Sabudana Khichdi with the recipe. Suffiecient for 6 people.
Ingredients:
2 and 1/2 Cups Sabudana/Sago
4 to 6 Green chillis
2 Cups Peanuts
3 Tbsp Oil
1 Tbsp Mustard Seeds
1 Tbsp Cumin Seeds
1 Tbsp Chana Dal
1 Tbsp Urad Dal
1 Tsp Turmeric Powder
2 Tbsp Coriander leaves
Procedure for soaking sabudana:
Sieve and wash sabudana in colander.
Sieve and wash till all the sticky residue of sabudana cleaned.
Sprinkle some water and soak it for 3 to 4 hours.
Keep checking the sabudana for every hour and if only if required sprinkle little water.
If we press the sabudana pearl with fingers, they should be mashed easily and should not stick to each other.
And if we mix the sabudana with hands no residue stick to our hands.
The above two points are very important to get a non sticky and tasty sanudana khichdi.
Procedure for sabudana khichdi:
Heat a kadai, dry roast peanuts.
Roast them on a low flame till the aroma comes out and the peanuts turns light brown.
Keep them aside to cool down.
Remove the skin and keep 2tbsp of peanuts separately for further use and grind the remaining into a coarse powder.
Heat oil in a kadai, add chana dal, urad dal. Fry them till they are golden.
Add roasted peanuts also.
Add mustard seeds, cumin seeds and allow them to splutter.
Hi friends, thank you friends for visiting my website and @EATeasyvegrecipes youtube channel. Today's recipe is goli idli. It is called uppu urundai in Tamil. Idli and goli idli both are not same. In idli recipe we have to add urad dal and boiled rice rava or idli rava as we call it in Andhra and Telangana. Whereas uppu urundai or goli idli takes only rice flour. It is another easy and quick breakfast recipe. But I enjoyed uppu urundai or goli idli as evening snack along with a hot cup of tea. These goli idlis can be served by itself as it does contain the spicy tempering. But serving with a spicy chutney or sambar would be the best combo meal.
Please check out for other simple snacks recipes: Telangana Kudumulu Mandakki Sarva Pindi
Please like, share and subscribe to easyvegrecipes YouTube channel for video recipes. And click the BELL icon for further notifications.
Uppu Urundai Recipe | How to make Goli Idli | (Uppu Urundai) Author: Sailaja Angara Preparation Time: Cooking time: Servings: 3 People
Uppu urundai or goli idli is a healthy and best evening snacks for kids. It is served as morning breakfast in some parts of South India.
Ingredients:
1 Cup Rice Flour
1 Cup Water
Salt to Taste
1 Tsp Ghee
1 Tbsp Oil
1 Tsp Mustard Seeds
1 Tsp Cumin Seeds
1 Tsp Chana Dal
1 Tsp Urad Dal
1 Red Chilli
1 Tsp Til/Sesame Seeds
1 Tsp Ginger
2 to 4 Green Chillis
4 to 6 Curry Leaves
1 Tsp Asafoetida
Procedure:
Chop ginger and green chillis.
Boil water in a kadai, add ghee.
When water starts boiling add salt and rice flour and mix well.
Take it off from the flame, transfer this rice flour dough into a mixing bowl.
Allow this to cool.
Knead the dough when it is cool to handle.
Make a smooth and soft dough.
Make small roundels with the dough and keep it aside.
Place all of them in a plate or in a wide bowl.
Steam them for 10 to 15 mins in pressure cooker or steamer.
Heat oil in a kadai, add chana dal and urad dal.
Once they start turning into light brown, add mustard seeds and cumin seeds.
Add chopped green chillis and ginger.
Add curry leaves and asafoetida.
Saute all of them for a minute and add sesame seeds.
Once the sesame seeds start spluttering add red chilli.
Add the steamed rice flour balls.
Fry them gently for 2 minutes without breaking them.
Switch off the flame and transfer them to serving bowl.
Serve uppu urundai or goli idli with any spicy chutney or simply enjoy them as it is.
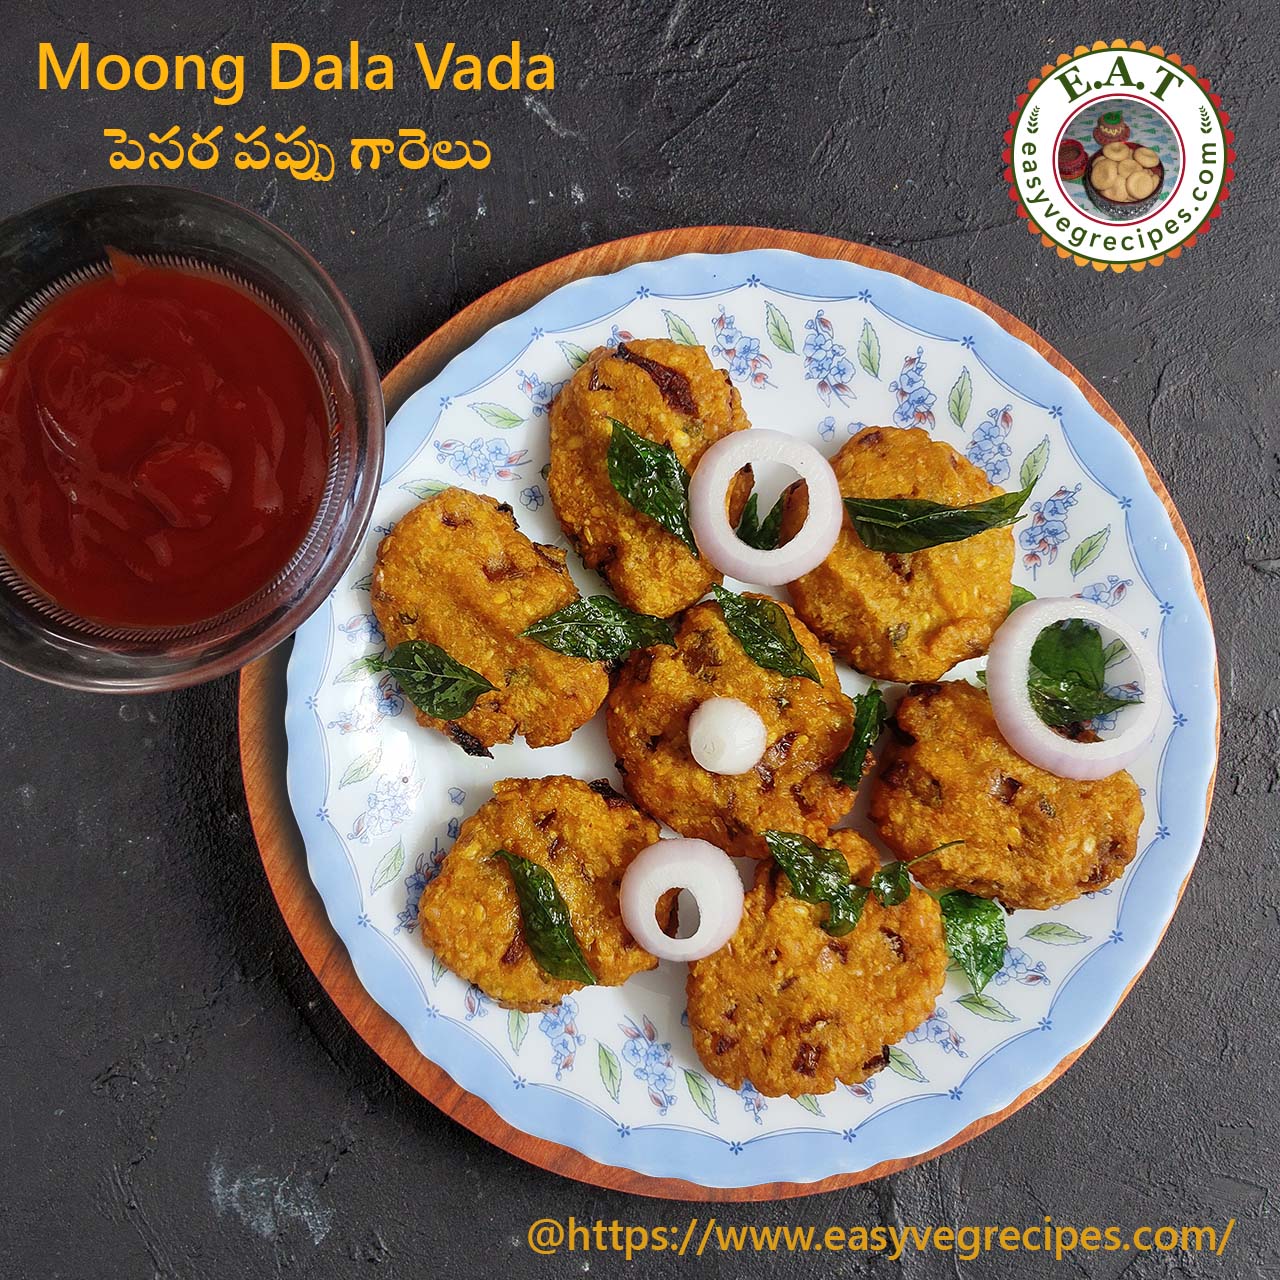
Hi friends, Thank you all for visiting my website and @EATeasyvegrecipes youtube channle. Today's recipe is pesara pappu garelu or moong dal vada. Pesarapappu garelu is a very interesting recipe, it can be made within 10 minutes. It is raining outside and we are tend to eat some hot crispy and spicy snacks along with a hot cup of tea or coffee. Vada or garelu is a South Indian savoury made with lentils and some condiments. They are crispy outside and fluffy inside. Great to serve with any chutney or just as it is.
Hi friends, Thank you all for visiting my website and @EATeasyvegrecipes youtube channel. Today's recipe is Potlakaya perugu pachadi or snake gourd thayir chutney. Yogurt or perugu is an integral part of Andhra cuisine. Without which a meal is incomplete. We can make different varities of perugu papchadi with different vegetables. They are the best accompanied with rice as well as roti too. Perugu pachadi is neither too spicy nor too mild. Even toddlers too like them.
Hi friends, Thank you all for visiting my website and @EATeasyvegrecipes youtube channel. Today's recipe is ridge gourd coconut curry. Ridge gourd is called beerakaya in Telugu. Actually it is a combination of chana dal and coconut along with ridge gourd. It is the best accompaniment for rice. It is a no onion no garlic recipe.
Ridge gourd has many good qualities like rich in dietary fibers, vitamin C, riboflavin, zinc, thiamin, iron and magnesium. Ridge Gourd is quite lower in saturated fats and calories. It is the best option for weight loss journey.
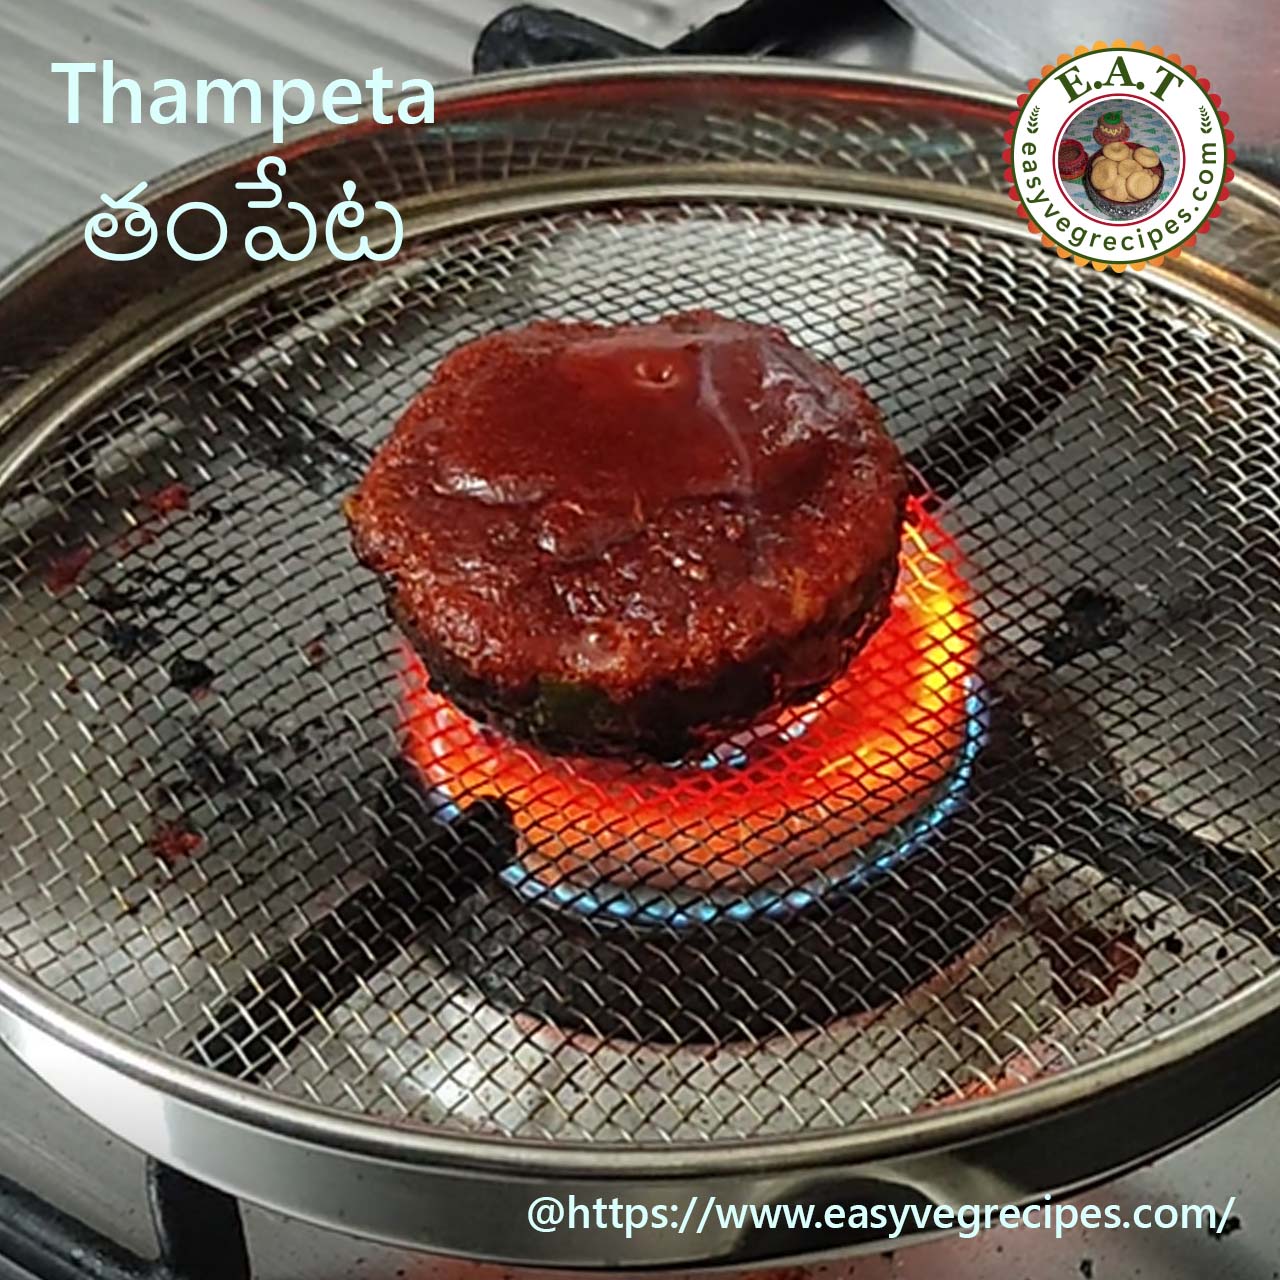
Hi friends, thank you all for visiting my website and youtube channel. Today's recipe is Thampeta recipe.
Thampeta (తంపెట), I really don't know how the name came. Those who can read Telugu can read the word given in the brackets. Others pronounce it first 'th' should be like 'Th' in 'theme', 'am' should be like 'um' in 'jump' or 'umbrella', 'pe' should be like in 'pen', and final 'ta' should be like in 'TOUGH', TURBINE.
Now about the fruit. It is called Citron or Oranges or Narinja in Telugu. According to google it is also called rough lime. We get them only in in Krishna, Guntur, Godavari and Prakasam districts of Andhra Pradesh state in India. Rather I have seen them only in those parts. These are available during winter season only. The fruit is sour in taste. Ripen fruit tastes sweet. The citron fruit skin has got lot of wrinkles or crease on it. Unlike sweet orange and lemon the skin of citron fruit is thick and also green in colour. Inside the fruit it appears like any other citrus fruit.
Now about the recipe. This recipe needs very less ingredients. And also it takes very less time to make. It goes very well with hot piping rice and a spoonful of ghee. Each half portion of the fruit can be shared among two people. Those who eat spicy food can take one half portion.
Click the video link below for a detailed recipe. Please like, share and subscribe to easyvegrecipes YouTube channel for video recipes. And click the BELL icon for further notifications.
Thampeta Recipe | How to make Thampeta Recipe (Orange Burn) Author: Sailaja Angara Preparation Time: Cooking time: Servings: 4 People
Orange or rough lime cooked in barbeque way.
Ingredients:
1 Orange / Narinja Kaya
2 Tsp Salt
2 Tsp Red Chilli Powder
1/2 Tsp Cumin Seeds
1/2 Tsp Oil
Procedure:
Cut the fruit into half as we cut any citrus fruit to make the juice.
In a bowl add salt, chilli powder and cumin seeds.
Mix them well.
Add little oil too and mix them well to make a paste like.
Put a spoonfull of the above made masal on the top of the fruit.
Put the fruit on the stove top directly.
Or we can use mesh plate too.
Cook it in the low flame.
Cook it till the flesh oozes out some juice or for 5 to 7 minutes.
Once done the outer layer or skin of the fruit becomes black.
Very Simple yet tasty Thampeta is ready to serve.
There is a method to combine it with the rice.
Take out the top layered salt, chilli mixture and mix it with rice.
And squeeze the juice into rice and mix well.
While mixing we may get the seeds, remove them and mix well.