Hi friends, thank you for visiting my blog. Hope you all like my recipes. Please like, share and subscribe to my easyvegrecipes YouTube channel for video recipes.
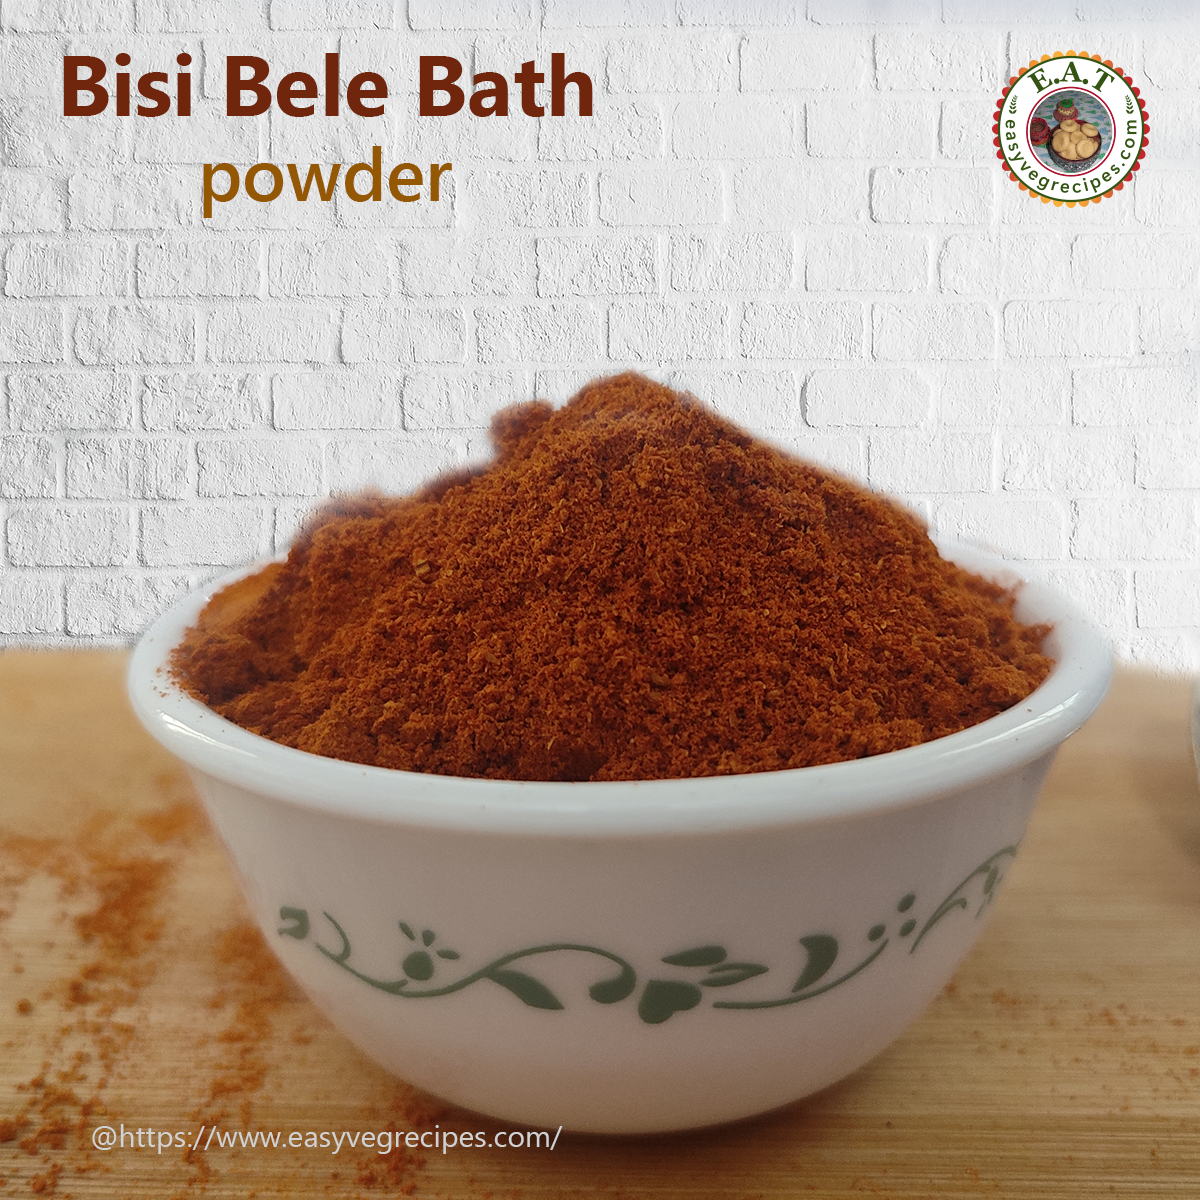
Today I am posting on how to make bisi bele bath powder recipe. Of course, we can use this in bisi bele bath and also in some curries. Preparing this powder saves a lot of time while making bisi bele bath. It's really very easy to make this powder.
Bisi Bele Bath Powder Recipe -- How to make Bisi Bele Bath Powder Author: Sailaja Angara Preparation Time: Cooking time: Servings:
A spice mix powder to be used in bisi bele bath and also in some curries. Ingredients for Bisi Bath Powder:
2 Tablespoon Coriander Seeds
1 Tablespoon Bengal Gram
1/2 Tablespoon Black Gram
1/4 Cup Dry Coconut
3 to 5 Cloves
2 to 3" Cinnamon Stick
1/2 Tablespoon Poppy Seeds
Procedure for Powder:
heat oil in a kadai, fry poppy seeds till they turn light brown. Keep it aside.
Grate the dry coconut.
Again heat the same kadai, add dry coconut and fry till it turn into light brown. Keep it aside.
Again heat the kadai and add all other ingredients and roast them till they tunr into golden colour.
Hi friends, Thank you for visiting my blog. Hope you all like my recipes. Please like, share and subscribe to my YouTube channel too for the recipe videos.
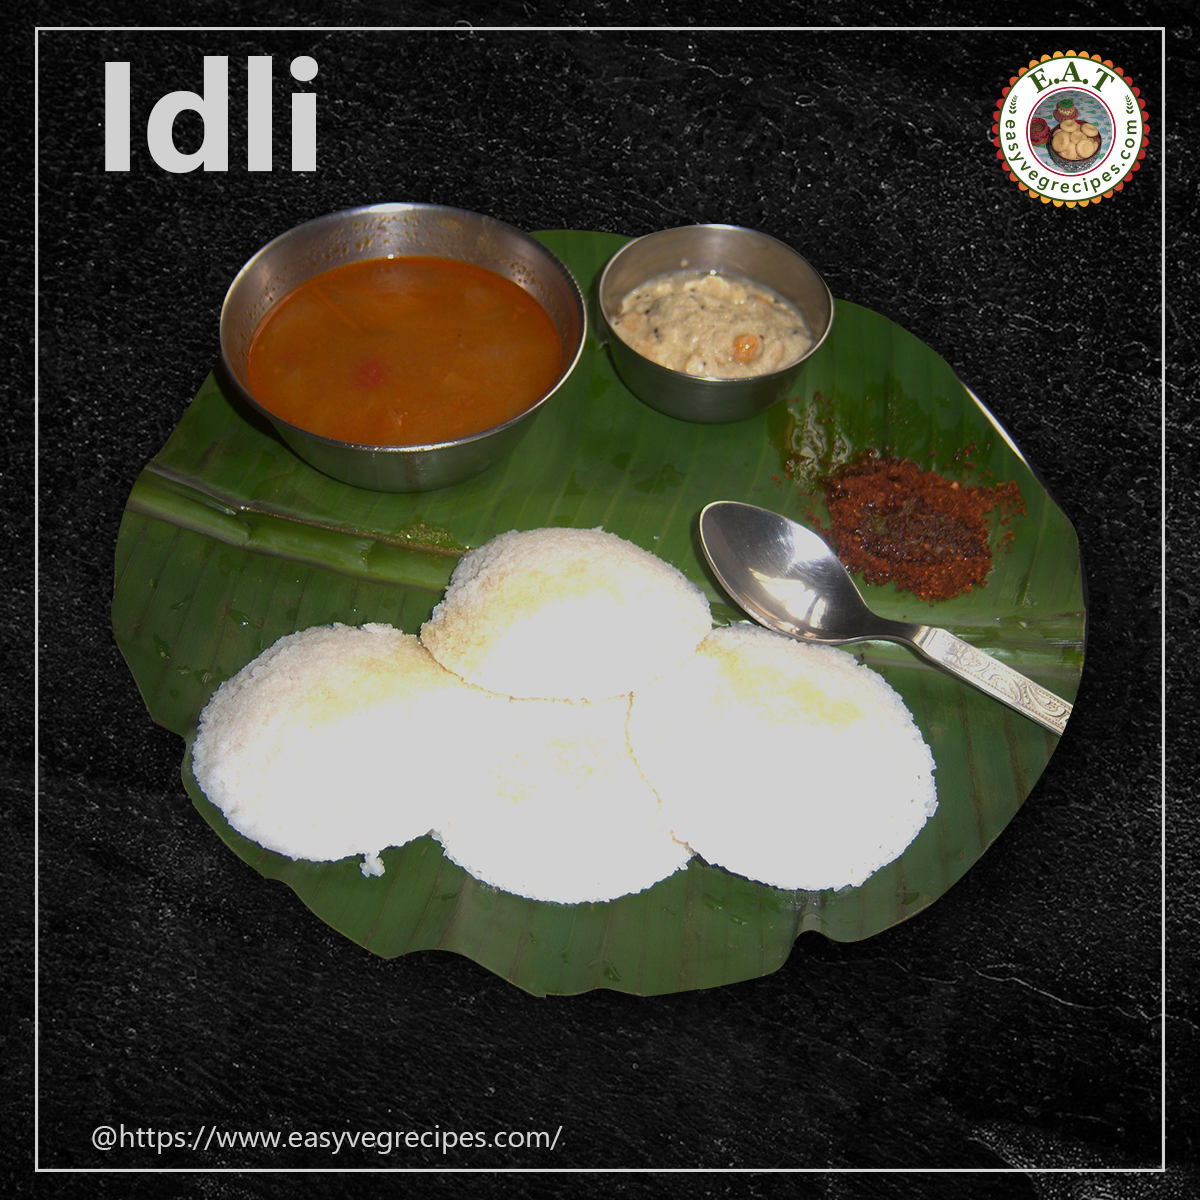
Today I am posting how to make soft and puffy Idli at home. Idli is a very common breakfast in South India. It is very healthy and easily digestable breakfast. Idli is made in two different ways one is with Idli rice, and the other one is with idli rawa. Generally we find idlis with dili rawa in Andhra and Telangana states. If we go down South we find idlis made with idli rice. To get soft and puffy idlis we need to prepare the batter before hand, approxmately 8 to 10 hours before making idlis.
Idli with Sambar and coconut chutney, Nalla karam is the best combo. You can check out for other breakfast recipes here.
Idli Recipe -- How to make Soft Idli -- Andhra Style Idli recipe Author: Sailaja Angara Preparation Time: Cooking time: Servings: 24 Idlis
Andhra style Idli with sambar and chutney si the best combo to start your day.
Ingredients:
1 Cup Whole Black Gram/Urad Dal/Gundu Minapapappu
3 Cups Idli rawa
Salt to Taste
Procedure:
Soak black gram/Urad dal/Gundu Minapapappu for 3 to 4 hours.
Soak idli rawa also for 3 to 4 hours.
Grind black gram to a fine paste in wet grinder or table top.
We can use mixer grinder also for grinding it.
While grinding add water little by little. The batter shouldn't become thin.
Grind it till the batter becomes soft and mushy. Let there won't be a single grain of the dal left.
Drain excess water from the soaked rawa, and squeeze out and keep aside.
Once done, transfer this to a big vessel, add the grounded batter also to it.
Mix both of them well with hands.
Add salt and again mix well.
Allow this to rest for 8 to 10 hours. This process would make the batter double up.
After the resting time is over, mix it again and make idlis.
Use idli moulds for making idlis. Brush each mould with some oil, pour a ladle or half of it in each mould.
Keep if ready and steam for 10 mins in pressure cooker or idli cooker.
Then lower the flame and steam for 5 more minutes.
Allow the idli cooker to cool for 10 mins and then serve.
Hi friends, thank you for visiting my blog. Hope you all like my recipes. For video recipes please like, share and subscribe to my easyvegrecipes youtube channel.
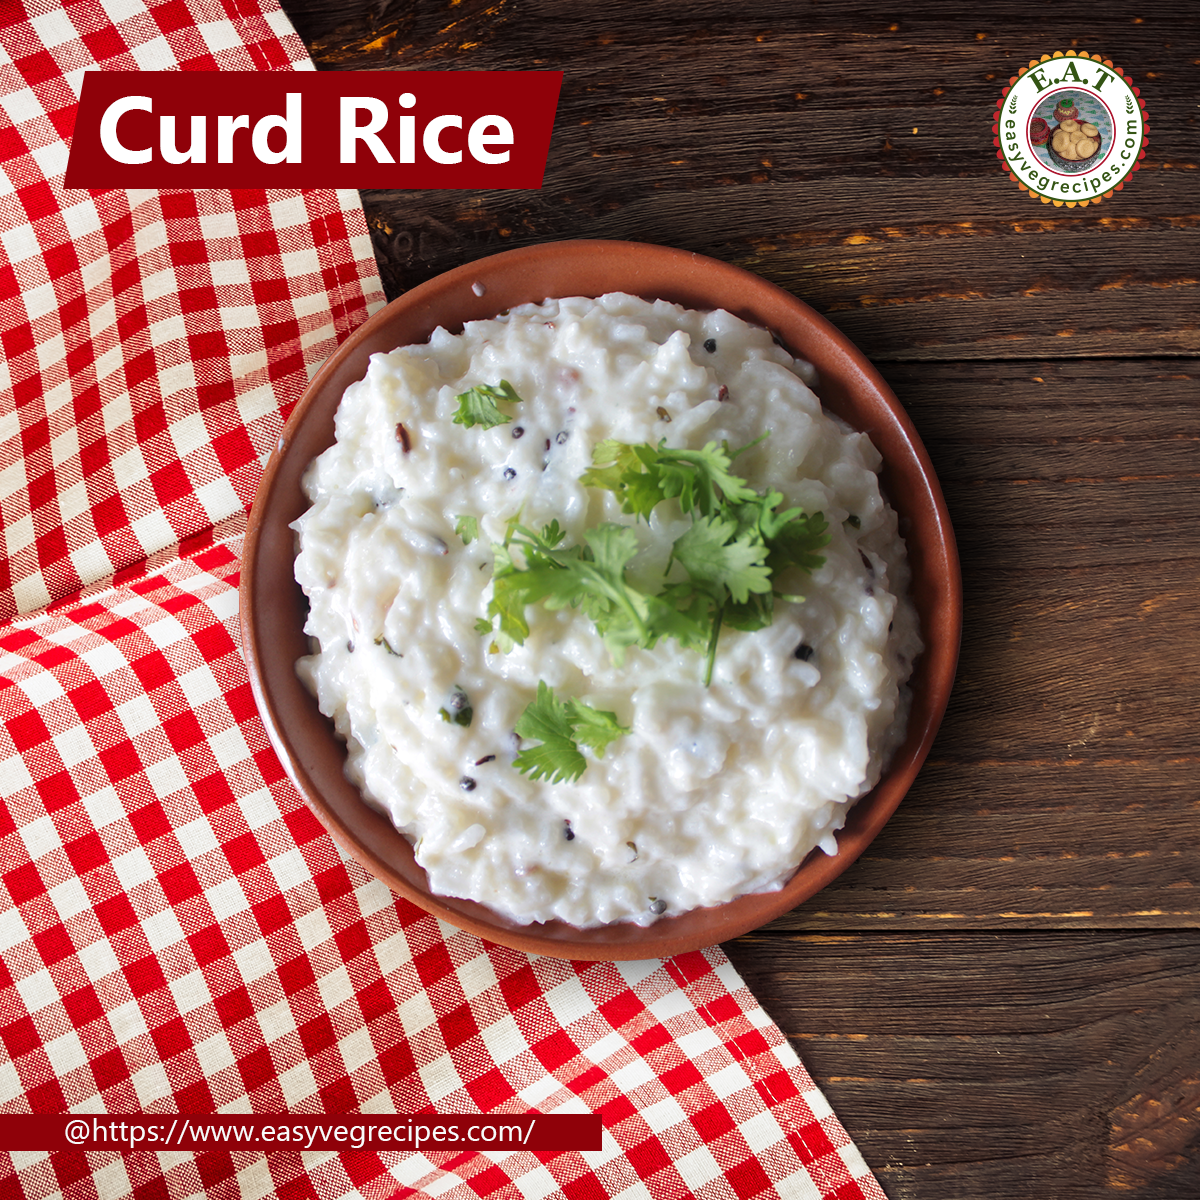
Today I am posting how to make curd rice recipe. Curd rice is a must have in every meal. We call it perugannam or doddojanam. It can be made with leftover rice also, but curd rice made with freshly cooked rice tastes really good. A very simple and easy recipe. The important ingredient in this is curd. Curd or yogurt can be made at home or we can use store bought curd also. Normally I make curd at home. Making of curd is an easy task, but it depends on the place where we live in. If you stay in a chill and cold climate place, then it will be tough. Due the weather conditions forming of thick curd would be difficult.
For more varieties of rice recipes click here.
Curd Rice Recipe -- How to make Curd Rice -- Curd Rice Andhra Style Author: Sailaja Angara Preparation Time: Cooking time: Servings: 6 people
Serve the chilled curd rice during the summer to beat the heat.
Ingredients:
1 Cup Rice
1 Ltr Curd/Yogurt
2 Tbsp Ghee
1 Tbsp Mustard Seeds
1 Tbsp Cumin Seeds
1 Tbsp Bengal Gram/Chana Dal
1 Tbsp Black Gram/Urad Dal
1/4 Tsp Asafoetida/Hing
1/2 Tbsp Black Pepper Seeds(Optional)
5 Green chillies (Finely Chopped)
4" Long Ginger (Finely Chopped)
10 to 15 Curry Leaves
Fistful of Coriander Leaves
Salt to Taste
Procedure:
Pressure cook 1 cup rice with 2 and 1/4 cup of water for 4 to 5 whistles.
Once the pressure cooker cooled, take the rice out and mash it with a ladle.
Let the cooked rice be soft and mushy.
Finely chop ginger and green chilles. and keep them aside.
Heat a pan, add ghee, mustard seeds, cumin seeds, bengal gram and black gram.
Allow them fry, then add hing/asafoetida.
Saute them well or till they turn golden brown.
Add green chillies and ginger, saute them.
Add curry leaves and coriander leaves also. Fry them well.
Add this tadka to the above cooked and mashed rice.
Hi friends, Thank you for visiting my blog. Hope you all like my recipes. Please like, share and subscribe to my YouTube channel too for the recipe videos.
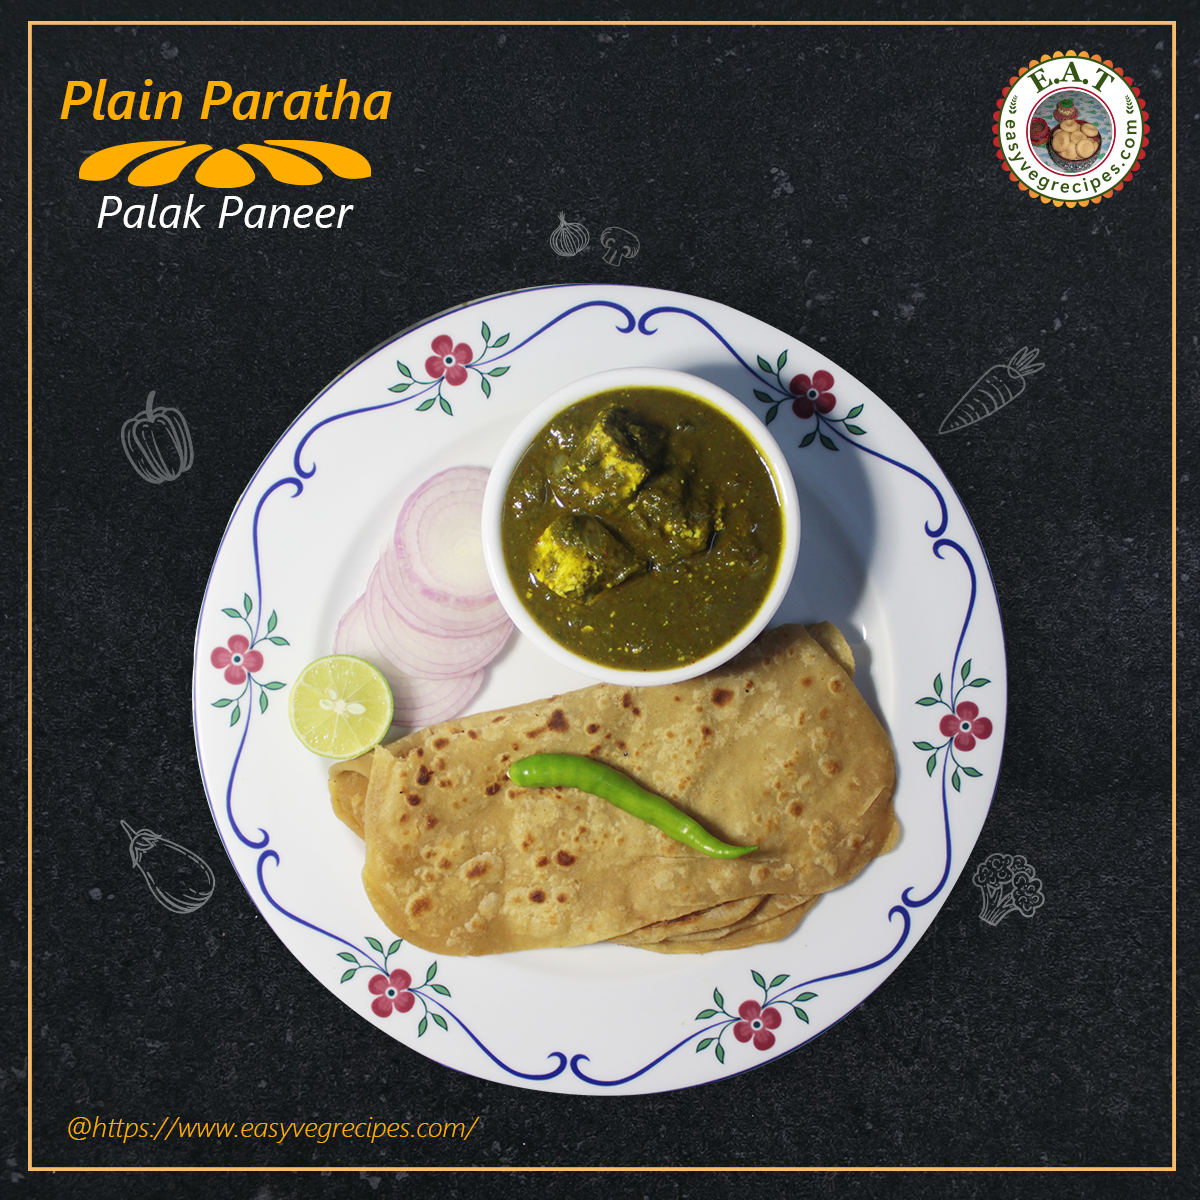
Today I am posting how to make plain paratha recipe. As a South Indian I know only two variants one is chapati and another one sukha roti or phulka. For me paratha is a dish which is made with stuffing something in the dough. But now with the advent of internet and everything is available in our hands(mobile) now I am able to make out the difference between chapati and paratha. Of course I am not going to do any knowledge sharing here about the differences. I like chapati/roti or plaing paratha very much. Given a chance I prefer to make them everyday, but selling them would become very tough for me as my people are not so fond of them. Once in a week there won't be any issue but everyday they are all rice or any SouthIndian stuff (dosa/idli) people. I have learned the art of making chapati soft and layered from my neighbour aunty who is from the state of Maharashtra.
This time I served Plain paratha with palak paneer, click here for the recipe. I have different varieties of parathas in the blog. Check out the recipes for Mooli Paratha, Methi Paratha, Cabbage Paratha, Aloo Paratha, Dal Paratha, Gobi Paratha, Paneer Paratha, Vegetable Paratha.
Plain Paratha Recipe -- How to make Plain Paratha Author: Sailaja Angara Preparation Time: Cooking time: Servings: 4 people
Plain Paratha serve it with any curry or even with curd and sugar tastes heavenly.
Ingredients:
3 Cups Whole Wheat Flour
salt to Taste
Water
3 Tbsp Oil
Procedure:
In a wide bowl take whole wheat atta.
Add salt to it and mix well.
Add water little by little and mix the dough until it combines well.
Knead it well with the support of palm and inner side of wrist.
Add oil and knead again.
Knead it thoroughly so that the entire oil absorbed into the dough. We have to knead approxametely for 5 to 10 minutes.
Indication for this is the dough should not stick to our hands.
Again apply some oil on the top of the dough and keep it aside.
Cover it and keep aside to rest for an hour. It can be rested more than that also.
After resting is over make equal portions of big lemon sized balls of the dough and make chapatis.
Take one portion of the dough and dust it with some dry flour, roll it into small circle.
Add a spoonful of oil and spread and make it into a half circle by folding in the center.
Fold it again from one end of the half circle to the other to form a triangle shape.
Again dust it with dry flour and roll it into circle, most of the times it turns out to be a triangle only.
Roll it equally on all sides and make chapati. Do not apply too much pressure while rolling. Apply little flour if required while rolling.
Heat tawa, drop the chapati on it.
Cook until small air pockets appear on top of the chapati and the color of the chapati starts to changing.
With the help of a flat spatula, flip the paratha and apply a spoonful of oil, spread it evenly over the chapati.
Flip the paratha and again apply a spoonful of oil on the other side too. Cook until there are some brown spots on both sides of the paratha.
Do not press the paratha with the spatula, just press gently on edges only.
When both sides have golden brown spots, transfer the paratha to a plate or cassarole.
Do the same with the remaining parathas too.
Serve hot parathas with your favourite spicy curry or Dal Fry.
Hi friends,
Thank you for vising my blog. Hope you all like my recipes, please like, share and subscribe to my youtube channel too for the recipe videos.
Today I will write how to make eggless sponge cake recipe. This recipe I picked it from online. I tried it so many times, in the beginning I failed and finally I succeeded. This time I have decided to write the recipe so that I would remember and follow the measurements for the next time. At a later time I would shoot and upload it into the channel also. Though I have very less number of cake recipes in my website, for those limited cake recipes click here.
Baking is not as easy as cooking on stove top. I love baking but a little bit scary about the end result. All ovens are not the same. We should keep ourselves hang around to learn it completely. Each and every oven varies in temperature and functionality.
I have a LG MC-7880PSR Convection model oven. It has got 27 autocook methods. Here in the recipe, I am giving the temperatures and time I set in my oven. But you can change accordingly. And I never tried cakes on stove top, whenever I make cake I use oven only. If the oven is not in working condition I stopped baking cakes.
Eggless Sponge Cake Recipe -- How to make Eggless Sponge Cake Author: Sailaja Angara Preparation Time: Cooking time: Servings: 6 People
Eggless Sponge Cake -- A kids favourite
Ingredients:
3 Cups Maida/All Purpose Flour
2 Cups Milk
1 and 1/2 Cups Sugar
3/4 Cup Butter
1 Tsp Baking Powder
1/2 Tsp Baking Soda
1/4 Tsp Salt
Procedure:
Bring the butter to room temperature, if it is in refrigerator.
Pre heat the oven at 350 degrees Farenheit or at 180 degrees Celsius for 10 mins.
Sieve maida/all purpose flour, baking powder, baking soda and salt. Keep it aside.
Grease and dust a 3*9 inches loaf pan. Keep it aside
In a wide bowl, using hand blender blend butter till it soft and moist. For about 5 minutes.
Add sugar to it and blend again for another 5 minutes. Or until it becomes super soft and creamy.
Scrape it with a spatula once and bring all the butter and sugar mixture to one.
Add milk and again blend it. For about 5 Minutes.
This step I hate because the entire cooking platform gets spoils as the milk spill all over, but we have no other option but to do it so do it slowly.
Again Scrape through and bring all the batter into one.
Now add sieved maida mixture or we can sieve directly into the above mixture too.
Mix gently, in cut and fold method, means while mixing cut the batter in the middle with a spatula and fold it again.
Do this process untill all the dry ingredients combines well with the wet ingredients.
Do not over mix and do it in only one direction.
Pour the batter into the greased tin, and bake it for 40 to 45 mins at 180 degrees celsius. Or until the piercing stick comes out clean.
Once the oven beeps, Leave it like that for two minutes.
Take it out and allow it to cool completely on wired rack
Serve it with any interesting toppings on it or as it is.
Hi friends,
Thank you for vising my blog. Hope you all like my recipes, please like, share and subscribe to my youtube channel too for the recipe videos. Today I will write how to make jeera rice recipe.
It's a very interesting, less spicy and simple recipe. I learned this one during my early marriage days.
I tasted it the first time when my husband and I went out for a dinner after watching the movie #DilwaleDulhaniaLeJayenge, starred #Kajol and #SRK aka #ShaRuhKhan. I liked it very much and tried it at home everyone at home liked it and appreciated my effort too. That was how the inspiration for my cooking journey started too. Even now when I prepare this dish I feel nostalgic. Our neighbouring aunt used to serve it with #BagaraBaingan. So also I too prefer to serve it like that only. You can check it out here for other rice varities from my kitchen.