Saturday, November 28, 2015

Cauliflower Leaves Chutney Recipe -- Chat Phat Chutney recipe -- How to make Cauliflower Leaves Chutney Recipe

Cauliflower Leaves Chutney
Whenever I purchase cauliflower, I wish to have tender leaves of it. I add some tomatoes and some greens and make a perfect spicy, tangy chutney with cauliflower leaves. A perfect combo for hot piping rice. Of course those leaves may not have any specific taste to them, but those spices we add to it make a good tasty chutney. This is right season to get tender and thin leaves. They are fiber rich.
Here in our markets we get them along with their leaves, some times they will be tender and some times a little ripen and brittle. To make chutney we need tender ones only. 
Preparation Time:  10 mins
Cooking Time: 10 mins
Recipe Category: Side Dish 
Recipe Cuisine: Andhra
Serves: 4 people

Ingredients:


  • Cauliflower Leaves - 1/2 cup 
  • Tomato - 1
  • Green Chillies - 5 to 7
  • Coriander Leaves - 1 tbsp
  • Spring Onion Greens - 1 (optional)
  • Salt - to taste
  • Oil - 2 tbsp
  • Mustard Seeds - 1 tbsp
  • Fenugreek Seeds - 1/2 tbsp
  • Black gram - 1 tbsp
  • Red Chillies - 12 to 15
  • Asafoetida - 1 tsp

Procedure:

  1. Chop cauliflower leaves and coriander leaves, cut tomato. If adding spring onion greens, chop that also. Wash them thoroughly. 
  2. Heat oil in a kadai, add mustard seeds, fenugreek seeds and black gram. When they start spluttering add red chillies and asafoetida. Keep aside.
    Cauliflower Leaves Chutney
  3. Again heat oil in the same kadai, add cauliflower leaves, tomato, coriander leaves and green chillies. Cook them for a while. Till they become soft. 
  4. In a blender jar, add portion of mustard seeds, fenugreek seeds, black gram and red chillies. Add cooked leaves and grind them to make a smooth chutney.
    Cauliflower Leaves Chutney
  5. Serve cauliflower leaves chutney with hot piping rice. 
    Cauliflower Leaves Chutney

Friday, November 20, 2015

Pav Bhaji | How to make Pav Bhaji Recipe

Pav Bhaji
Pav Bhaji is a Mumbai street food, consisting of curry i.e. bhaji served with pav or soft bread roll. 
I read some where in the web or in news paper about the invention of it, was invented for textile mill workers who needs a fast and tummy full lunchtime dish. It should also be protein, vitamin and fiber rich as well as should not make the workers lazy after having it. Very interesting right. Now it became every household food.  This is the right season to make it, because we get all the vegetables. I like to serve this bhaji as  sidedish for roti also.
A very easy dish to make, if we have Pav ready. We can get it in any grocery shop or we can make them at home also. Still I have to perfect in making Pav, so for now I get them from grocery shop only. 
Preparation Time: 15 mins
Cooking Time: 20 mins
Recipe Category: Main Course
Recipe Cuisine: Maharashtra
Serves: 4 people 

Ingredients:


  • Carrots - 2 Medium
  • Potatoes - 2 Medium
  • Capsicum - 2 Medium
  • Cabbage - 50 grms
  • Green Peas - 1/2 cup
  • Beetroot - 1 small
  • Beans - 5 to 7
  • Cauliflower - 5 to 7 florets
  • Onions - 2 Medium
  • Tomato - 2 Medium
  • Salt - to taste
  • Turmeric Powder - 1 tsp
  • Red Chili Powder - 1 tbsp
  • Coriander Powder - 1 tbsp
  • Aamchur Powder - 1 tsp
  • Garam Masala Powder - 1 tbsp
  • Pav Bhaji Masala Powder - 1 tbsp
  • Ginger Garlic Paste - 1 tbsp
  • Oil/ghee/butter - 3 tbsp
  • Pav Buns - 12 buns (each 3 buns)
  • Butter - 4 to 6 tbsp

Procedure:

  1. Chop all the vegetables. Make cubes of carrots, potatoes, beetroots. 
  2. Chop cabbage, onions, beans and tomatoes. 
    Pav Bhaji
  3. Pressure cook all the vegetables and peas, except onions and tomatoes for three to four whistles. 
  4. Once the cooker cooled pour them in colander, collect the water in veggies in a separate vessel. Keep it for further use.
  5. Mash the veggies with a potato masher.
    Pav Bhaji
  6. Meanwhile, heat oil/ghee/butter in a kadai, add ginger garlic paste, fry it.
  7. Add chopped onions, fry them till they become translucent. Add tomatoes and fry them till they become mushy.
    Pav Bhaji
  8. Add salt and turmeric powder. Cook them till become soft. Add mashed veggies. 
    Pav Bhaji
  9. Add water, which we kept earlier. 
  10. Add red chilli powder, coriander powder, aam chur powder, garam masala powder and pav bhaji masala powder. Mix well.
    Pav Bhaji
  11. Add more water if necessary. Check salt as we add more water. Let it boil for a while or five minutes.
    Pav Bhaji
  12. Cut pav bun in the middle. Do not cut completely, just make a slit.
  13. Heat tawa, wide open the pav buns and put them on tawa and cook for a short while. 
  14. Apply a little butter. 
  15. Serve hot pav bhaji with sliced onions and lemon. 
  16. We can serve them with chopped onions on top of the bhaji. 
    Pav Bhaji

Thursday, November 19, 2015

Namak Para Recipe -- Namkeen -- How to make Namak Para Recipe

Namak Para
Namak para, We call them as namkeens in my childhood days. I have learned them from Sister-in-Law, she told me to add dalda or butter but I did not. I added nothing just salt and ajwain. Kids liked it very much, they have finished them within 24 hours. 
Preparation Time: 5 mins
Cooking Time: 10 mins
Recipe Category: Snacks
Recipe Cuisine: Andhra
Serves: 4

Ingredients:


  • Maida/All Purpose Flour - 1 cup
  • Salt - to taste
  • Ajwain/Carom Seeds - 1 tsp
  • Water - to make dough
  • Oil - for frying

Procedure:

  1. In wide bowl mix maida, salt and ajwain seeds. 
  2. Add water to it and make dough.
    Namak ParaNamak Para
  3. Heat oil in a kadai. 
  4. Make equal portions of the dough. Roll it with rolling pin.
  5. Roll it like chapati. Chapathi should be in medium thickness, neither too thin nor too thick.
  6. Cut into diamond shape, I have small cookie cutter, so I can get equal size of all of them. 
    Namak Para
  7. We can cut them using a kitchen knife also.
  8. Fry them in hot oil, on medium flame till they turn light brown color. 
    Namak Para
  9. Once done transfer them onto a absorbent paper. 
    Namak Para
  10. Do the same with the rest of the dough. 
  11. Once they are cooled keep them in an air tight container. 
    NAmak Para

Tuesday, November 17, 2015

Ponganalu Recipe -- Paniyaram -- How to make Gunta Ponganalu Recipe

Ponganalu
Gunta Ponganalu -- Ponganalu -- Paddu -- Paniyaram -- Name may change but almost all of them are same. Ponganalu is the traditional snack of Andhra. It is fluffy and smooth. This is served in breakfast, with some spicy chutney. They are prepared in a special skillet which has slots (guntalu). It is called as ponganalu or paniyaram pan. We get non-stick pans and traditional stone pans also. It is better to use non-stick pan. But I have stone pan, so I use it.  
Ponganalu

Normally they are made with dosa or idly batter. Add some chopped onions, ginger and green chillies to get tasty ponganalu. I normally make with one or two day old dosa batter, as it will have little sourness.
Preparation Time: 10 mins
Cooking Time: 5 mins for each set
Recipe Category: Breakfast
Recipe Cuisine: Andhra
Serves: 6

Ingredients:

For batter: 

  • Rice - 3 cups
  • Black Gram - 1 cup
  • Fenugreek Seeds - 1 /2 tbsp
  • Flattened Rice - 1/2 cup
  • Salt - to taste
To mix with batter:
  • Onions - 2 
  • Green Chillies - 3
  • Ginger - 3" long
  • Cumin Seeds - 1 tbsp
  • Salt - to taste
  • Oil - 2 tbsp

Procedure:

For batter:
  1. Soak rice, black gram, fenugreek seeds and flattened rice for about 3 to 4 hours.
  2. Grind them to fine and smooth paste. Keep it aside to ferment for at least 10 to 12 hours.
  3. It is good to use one or two days old batter to get nice fluffy ponganalu. Or else prepare the batter a day before making them.
For ponganalu:
  1. Prepare batter a day before and allow this to ferment for 10 to 12 hours.
  2. Finely chop onions, ginger and green chillies. Mix all of them with the batter.
  3. Heat ponganalu pan. Add a little oil to it. 
  4. Let the fumes come up, drop a spoonful of batter in each slot.
    Ponganalu
  5. Cover it and let it cook for 2 mins.
  6. Once they are done, turn them and also cook on the other side. 
  7. Serve hot ponganalu with spicy chutney. I served them onion chutney.
    Ponganalu

Monday, November 16, 2015

Poha Mixture -- Atukula Mixture -- How to make Andhra Style Poha Mixture

Poha Mixture
Poha mixture or Chivda mixture is made in different styles in different regions. We can add any type of nuts to it. It is very easy recipe and kids also love it very much. Serve it with hot piping tea or can have a fistful of it anytime.  We have two types of poha or flattened rice; one is thick and another one is thin. We can use both of them for making mixture. We use thick one only for making upma and pulihora. Thin one is used in dosa batter and to make mixture. For this dish I used thick one. 
Preparation Time: 5 mins
Cooking Time: 20 mins
Recipe Category: Snacks
Recipe Cuisine: Andhra
Serves: 5

Ingredients:


  • Poha/Flattened Rice/Atukulu - 3 cups
  • Peanuts - 1 cup
  • Roasted Gram - 1 cup
  • Dry Coconut - 1 cup
  • Green Chillies - 3 to 5
  • Curry Leaves - 10 to 15 or fist ful
  • Salt - to taste
  • Turmeric Powder - 1 to 2 tsp
  • Oil - 3 tbsp
  • Mustard Seeds - 1 tbsp

Procedure:


  1. Slit green chillies. Wash curry leaves and dry them.
  2. Keep poha, peanuts, roasted gram and cut dry coconut into small pieces ready in separate bowls to make it easy.
    Poha Mixture
    Poha Mixture
  3. Heat 1 tbsp of oil in a kadai. Add peanuts and fry them till they turn light brown color. Take them in a wide plate.
  4. Again in the same kadai, add roasted gram and fry for a while. i.e. 2 to 4  mins. Take them also in the same plate.
  5. Fry dry coconut in the same kadai. 
    Poha Mixture
  6. Again heat 1 tbsp of oil in the same kadai, add mustard seeds, when they start spluttering, add slit green chillies and curry leaves. Fry them till they become crispy. 
  7. Add turmeric powder and salt. Add poha to it and fry for 5 mins. Or till it become crispy.
    Poha Mixture
  8. Add all other ingredients to it and fry for 2 more mins, so that all the salt and turmeric powder adjust with them.
  9. Serve this poha mixture of Andhra style with hot tea.
    Poha Mixture

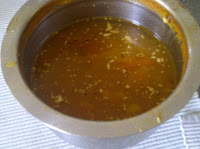
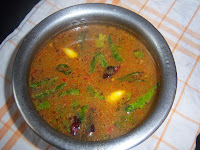
Rasam Recipes -- Rasam -- How to make different varieties of Rasam


Winter has come. Mornings are filled with chillness and fog around making us curl up for more time. This season we need to have some thing in our daily diet which make us get up from the bed and rush. So, to keep us healthy and keep running we need to have easily digestible and of course tasty diet. I promise rasam is the best source for that. So, enjoy spicy and hot rasam varieties from this blog,all compiled at one place.


Enjoy South Indian Rasam or Charu or Broth:

Rasam
Rasam is the best South Indian delicacy. In fact, an age-old belief is that one's cooking skills can be testified by the quality of Rasam (as it is called in South India) or Charu (in Telugu) or broth (a concoction of a few spicy ingredients) he/she makes. To a large measure, it is true also.

A piping hot Rasam draws people to the dining table spreading so much of fragrance....Enjoy South Indian Rasam or Charu or Broth


Vellulli Charu -- Garlic Rasam -- another variety:

This is the best season for hot and spicy rasam, as the weather outside is very chill. This is another variety of garlic rasam. The recipe is suggested by my MIL.


Healthy Rasam -- Healthy Chaaru -- Rasam with Curry Leaves:

I have learned this recipe from my domestic helper.She used to prepare this whenever she feels sick and got the ingredients blended in my blender. So I also learn this and started preparing it whenever we have cold climate. It is really good for kids also, as the ingredients in this are good for digestion and helps in clearing the blockages in the throat. First we need to prepare masala and then make charu or rasam.
Healthy Rasam -- Healthy Chaaru -- Rasam with Curry Leaves


Garlic Rasam -- Vellulli Chaaru -- Rasam with Garlic and Peppercorns:

A good tangy and spicy recipe.  It goes well with rice or we can drink it as it is. A simple recipe. 
Garlic Rasam -- Vellulli Chaaru -- Rasam with Garlic and Peppercorns


Tomato Soup -- Tomato Rasam:

I donno the reason behind the name of this recipe, b'coz we consume this recipe with rice unlike other soups.  My Grandmother used to prepare this. My mother and my aunt learned this from her and so we all from them. My son calls it as 'soup rasam'. It is very easy to make and tomatoes are good for health especially heart. This can be stored for two days also.
Tomato Soup -- Tomato Rasam


Tomato Rasam -- How to make Tomato Rasam -- Tomato Chaaru:

Tomato rasam is a very simple, easy and tasty dish to make. This is the season for nice juicy and tangy tomatoes. Make best use of them by preparing Chutney,Tomato Chutney, Dal (Pappu), Avakaya, Puree, Toamto Soup, Tomato Masala Curry, Tomato curry and Chaaru. This is recipe I have learned from one of my friend, her mother is very famous in making different kinds of rasams though she is Telugugu.
Tomato Rasam -- How to make Tomato Rasam -- Tomato Chaaru


Tomato Coconut Rasam --  Kobbari Tomato Chaaru:


Tomato coconut rasam is a new dish. This dish I have learned from my mother. I do not know, where she got the recipe from. It is really a very tasty dish. We do not find any difference when we have a look at the dish but we find it only when we taste it.
Tomato Coconut Rasam -- Kobbari Tomato Chaaru


Raw Mango Rasam -- Raw Mango Rasam Recipe -- Mamidikaya Chaaru:

One more recipe with raw mangoes, a very simple and tasty mango rasam. I got this recipe from one of my friend's relatives. She uses mangoes in the place of tamarind for makng rasam, sambar also. We get a very different taste. 
Raw Mango Rasam -- Raw Mango Rasam Recipe -- Mamidikaya Chaaru


Majjiga Charu -- Rasam with Buttermilk:

Majjiga Charu is typical Andhra dish. It goes very well with rice. It is different from majjiga pulusu. It is another yogurt based dish and can be prepared very fast. Much ingredients are not required to make this dish, only onions and little yogurt or buttermilk are enough.
Majjiga Charu -- Rasam with Buttermillk


Nimmakaya Chaaru -- Rasam with Lemon:

Nimmakaya Charu or Lemon Rasam as the name goes it is made with lemon juice. A sour and spicy soup goes very well with hot piping rice. Of course we can have it as a soup also. It is very simple and easy dish to make.  Very less ingredients are required to make it.
Nimmakaya Chaaru -- Rasam with Lemon


Pachi Pulusu -- Raw Rasam:

Pachi Pulusu or raw rasam as the word goes is a unheated version of tamarind soup. This can be done in a jiffy as it does not need any cooking except for tempering and making masala.  Pachi Pulusu is a traditional Telangana recipe usually prepared during summers to beat the heat. 
Pachi Pulusu -- Raw Rasam


Pappu Charu -- How to make Pappu Charu Recipe:


Pappu charu is a complete Andhra recipe, a good accompaniment to hot piping rice. I have learned it from my friends. They normally add all other vegetable like carrot, okra, baingan etc., also, but I prefer to add only onion and garlic. We need to make a special powder for this. It is called sambar karam. Of course that can used in other curries. Those who taught me use it in other curries also. 
Pappu Charu -- How to make Pappu Charu Recipe


Saturday, November 07, 2015

Rava Kesari Recipe -- How to make Rava Kesari -- Easy Sweet Recipes

Rava Kesari
Rawa kesari or Rava Kesari, is the most easy sweet. It is made with Semolina or Suji. It is made during Satyanaraya Swami Vratam puja in my home, but with a little changes and the color will be white or light golden color.
When I was a kid it is served in marriages. I used to love it and asked my mom to make as it is served. She is so lovely always make it for me specially. I used to love that color and the shape mainly that diamond cut. I called it 'Diamond Sweet'.
Whenever I wish to have sweet I prefer make only two sweets one is this and the other one is Semiya payasam or kheer.
Preparation Time: 10 mins
Cooking Time: 20 mins
Recipe Category: Sweet, Dessert
Recipe Cuisine: South Indian
Makes: 25 pieces

Ingredients:


  • Suji/Semolina - 1 cup
  • Sugar - 1 cup
  • Water - 3 cups
  • Ghee - 1/4 cup
  • Orange Food Colour - a pinch
  • Cardamom Powder - 1 tsp

Procedure:

  1. Heat 1/4 cup of  ghee in a kadai, add suji and fry till the raw smell goes off.
    Rava Kesari
  2. Add water and allow it to just boil. 
    Rava Kesari
  3. Now add sugar and mix well. Let it boil for a while.
  4. Add food colour to it. Food color can be add directly or it can be mixed with water and added to suji. I added it directly. 
    Rava Kesari
  5. Once the color mixed with the rawa, add cardamom powder. Mix it again. Allow it to cook.
  6. Meanwhile apply ghee to a plate on which we have to pour the suji mix.
    Rava Kesari
  7. While stirring occasionally, cook it till the suji does not stick to the kadai. And also becomes as one round ball. This may take 10 to 12 minutes. Cook on low flame only.
  8. Once kesari reached desired consistency, Pour this on to the greased plate and spread. 
    Rava Kesari
  9. Cut it into desired shapes, normally it is in diamond shape only. 
  10. I decorated it with cashew nuts on top of it. 
  11. Serve this simple sweet for this festive season. Enjoy!!!
Rava Kesari